Some days you want to move your body without changing clothes, without clearing a whole room, and without worrying that the floor, your joints, or your energy will “argue back.”
For that exact reason, this beginner chair workout at home gives you seated exercises that build strength, circulation, and confidence while keeping the vibe gentle, steady, and welcoming.
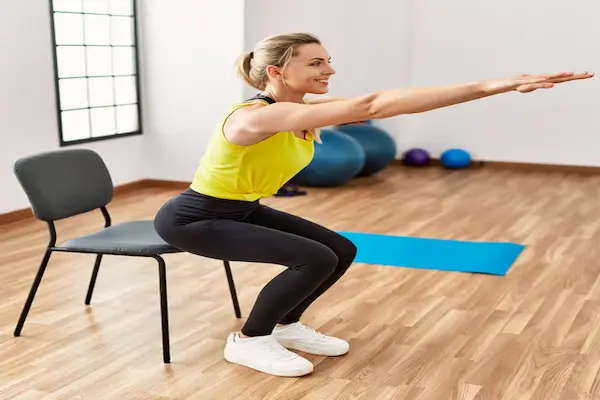
Beginner chair workout at home: what this routine is really for

Instead of chasing sweat as the only proof you did something, this chair workout routine focuses on comfortable effort, controlled movement, and the kind of strength that supports everyday tasks.
Many beginners discover that a joint friendly home workout becomes the easiest way to stay consistent, because consistency grows when a routine feels safe enough to repeat on ordinary days.
Feeling stronger in a chair translates to feeling steadier when you stand, walk, lift light objects, reach overhead, or get up from the couch without that shaky “where is my balance” moment.
Progress here is measured by smoother breathing, better posture, and less stiffness during the day, rather than by how intense the workout looks from the outside.
Who this chair workout routine can support
- This plan works well for beginners who prefer seated movement because of comfort, limited space, or a desire for lower-impact training.
- That same structure can help people who are rebuilding fitness after a break, because predictable seated exercises reduce decision fatigue.
- Gentle movers who want to protect joints often like this approach, because the chair provides stability while you practice control.
- Busy schedules also benefit, because you can complete a short sequence while dinner cooks or while you take a quick break from work.
What you should feel during a joint friendly home workout
- Muscles working in your thighs, hips, upper back, shoulders, and core, while your breathing stays possible and your face stays relaxed.
- Warmth building gradually, rather than a sudden spike that makes you hold your breath or rush through movements.
- Effort that feels like “I’m doing something helpful,” not “I’m fighting my body,” because supportive training should feel cooperative.
- A calmer nervous system afterward, especially if you pair the routine with steady exhalations and unhurried pacing.
Safety first: choosing a chair and setting up a stable space
Before any seated exercises begin, the most important step is using a chair that feels solid, because a wobbly chair forces your body to tense in unhelpful ways.
Floor stability matters just as much as chair stability, since slipping feet can create sudden twists that turn a gentle routine into an uncomfortable surprise.
Comfort increases when your setup is simple and repeatable, because you are more likely to return tomorrow when today felt smooth.
Chair choice checklist for beginners
- Choose a sturdy chair that does not roll, because wheels can slide when you press through your feet or shift your weight.
- Pick a chair with a firm seat, because deep cushions can tilt your pelvis and make posture harder to maintain.
- Use a chair height that allows both feet to rest flat, because dangling feet often increase hip flexor tension and low-back strain.
- Select a chair without armrests if possible, because free arms make many movements easier, although armrests can help balance for some people.
Floor and space checklist for a safer chair workout routine
- Place the chair on a non-slip surface, or position it on a yoga mat that does not slide, because stable footing keeps your movement confident.
- Clear enough space for your arms to reach wide and overhead, because cramped movement encourages awkward shoulder positions.
- Wear shoes that feel secure, or go barefoot on a grippy surface, because slipping turns simple leg work into a balance challenge you did not request.
- Keep water nearby, because dehydration can worsen dizziness, especially if you are new to exercise or you are training in a warm room.
A quick setup routine that takes less than one minute
- Set the chair so two back legs lightly touch a wall, because that can prevent sliding and add a feeling of security.
- Plant both feet hip-width apart, because that stance gives you a stable base for leg work and posture drills.
- Sit tall and scoot forward slightly, because perching on the front half of the seat often makes core engagement easier.
- Do one slow inhale and one longer exhale, because a calmer breath often reduces tension in the neck and shoulders.
When to pause immediately during seated exercises
- Dizziness, lightheadedness, or nausea is a clear cue to stop, sit still, and breathe slowly until you feel stable again.
- Sharp pain, joint catching, or sudden strong discomfort is a signal to pause and choose a gentler option, because pain is not a “push through” message.
- Chest pressure, fainting feelings, or unusual shortness of breath beyond normal exertion requires stopping and seeking professional input, because safety always outranks completing a routine.
How hard should a beginner chair workout at home feel?
Intensity is a dial you can turn up or down, and beginners do best when they start at a level that feels sustainable rather than heroic.
A helpful target is “moderate effort,” where you feel muscles working and your heart rate gently rising, while you can still speak in full sentences without gasping.
Recovery between sets should feel quick enough that the session stays calm, because chair training is most effective when you can repeat good form many times.
Use this simple 1–10 effort guide
- Levels 2–3 feel like easy movement that warms you up, which is perfect for stiff mornings or recovery days.
- Levels 4–6 feel like moderate effort where muscles notice the work, which is ideal for most of this chair workout routine.
- Levels 7–8 feel challenging and a bit breathy, which can be useful in short bursts if your form stays clean and your body feels safe.
- Levels 9–10 feel like max effort, which is not necessary for a joint friendly home workout and often increases strain for beginners.
Body signals that help you adjust without guessing
- Steady breathing and smooth control are green lights, because they suggest you are working with your body rather than against it.
- Shaky form, breath-holding, or neck tension are yellow lights, because they suggest you should slow down, reduce range, or rest longer.
- Sharp pain, dizziness, or symptoms that feel alarming are red lights, because they require stopping and possibly professional guidance.
Warm-up: 3 minutes of gentle movement to feel ready
A warm-up prepares joints and wakes up coordination, which makes the first real set feel smoother and usually reduces the chance of feeling dizzy when you start moving.
Gentle movement also helps your brain learn the pattern of the routine, which matters because confident repetition is what makes beginners stick with exercise.
3-minute seated warm-up sequence
- Posture reset for 30 seconds, where you sit tall, relax shoulders down, and imagine your head floating gently upward while your ribs stay soft.
- Seated march for 45 seconds, where you lift one foot and then the other with a comfortable rhythm while swinging arms lightly at your sides.
- Ankle pumps for 30 seconds, where you point toes forward and then pull toes back, because warm ankles often make legs feel more stable.
- Arm circles for 30 seconds, where you circle slowly forward and then backward, because shoulders like a gradual increase in range.
- Side reach for 45 seconds, where you slide one hand down your thigh while the other arm reaches overhead, keeping the movement gentle and breath-led.
Optional warm-up upgrade for extra stiffness
- Add 3 slow seated hip hinges, because hinging teaches your hips to share work and often reduces low-back tension.
- Include 3 slow shoulder blade squeezes, because upper-back engagement can make posture feel instantly more supported.
Seated exercises library: moves you will use in the routine
Each move below is described in detail so you can train without guessing, and each one includes a safer option when your body asks for less.
Range of motion is always optional, because comfortable movement repeated often is more valuable than forcing depth once.
Seated posture stack and breathing brace
Comfortable core engagement begins when your ribs sit gently over your pelvis, because that stacked feeling supports the spine without rigid bracing.
- Place both feet flat and imagine your sit bones heavy on the chair, because grounding reduces wobble.
- Inhale softly through the nose, then exhale a little longer while you feel your waist gently firm like a wide belt tightening one notch.
- Maintain that “firm but breathable” support as you continue, because breath-holding can create neck tension and dizziness.
- Do this for 3 to 5 slow breaths whenever you want to reset form.
Seated march with arm drive
Marching warms hips and raises heart rate gently, which makes it a perfect anchor move for a joint friendly home workout.
- Lift one knee a few inches while the opposite arm swings forward, because natural cross-body motion improves coordination.
- Alternate sides with a steady pace that allows conversation, because steady pacing keeps the session beginner-friendly.
- Stay tall through your chest while your shoulders relax down, because shrugging often signals you are working too hard.
- Work for 30 to 60 seconds at a moderate pace.
- Choose a smaller lift if hips feel tight, because tiny ranges still build circulation and practice.
Seated knee extensions for thigh strength
Knee extensions strengthen the front of the thighs, which supports standing up, stair climbing, and steadier walking.
- Extend one leg until it feels straight or nearly straight, keeping the movement slow enough that the knee feels comfortable.
- Pause briefly with toes pulled back, because that can wake up the shin and ankle in a gentle way.
- Lower with control and switch sides, because controlled lowering builds strength without joint strain.
- Aim for 8 to 12 reps per leg.
- Reduce the range if the knee feels cranky, because partial reps can still strengthen safely.
Seated heel raises for calves and circulation
Calf work supports ankle stability and can feel especially helpful if you sit a lot during the day.
- Press the balls of your feet into the floor and lift your heels, keeping knees relaxed and posture tall.
- Pause at the top and breathe out slowly, because calm breathing prevents rushing.
- Lower heels softly, because gentle landings keep the movement smooth.
- Complete 12 to 20 reps at a comfortable tempo.
- Try one-leg heel raises only if balance feels secure, because stability comes first.
Seated toe lifts for shins and balance support
Toe lifts strengthen the front of the lower leg, which can support balance and improve how your feet feel during walking.
- Keep heels planted and lift toes toward your shins, staying in a range that feels smooth.
- Hold for a second while exhaling, because breath timing helps you stay relaxed.
- Lower toes with control, because control matters more than speed.
- Perform 10 to 15 reps with steady breathing.
Seated hip hinge for hips and back-friendly strength
Hip hinging teaches your hips to do the work of leaning forward, which often reduces the urge to round your low back when you reach for things.
- Place hands on thighs and gently tip forward from the hips, keeping your spine long like you are bowing politely.
- Stop when you feel a mild stretch in the hamstrings or glutes, because forcing depth is not required.
- Return to tall posture by squeezing glutes lightly, because hips should help you come back up.
- Do 6 to 10 slow reps, using an exhale as you return upright.
- Keep the range smaller if dizziness appears, because forward bends can trigger lightheadedness for some people.
Seated glute squeeze holds for hip support
Glute activation helps many beginners feel more stable through the pelvis, especially if the low back tends to feel overworked.
- Sit tall and gently squeeze your glutes as if you are trying to hold a piece of paper between them, keeping the effort moderate rather than maximal.
- Hold for 3 to 5 seconds while you keep breathing, because breath-holding defeats the purpose of a gentle routine.
- Release fully before the next squeeze, because relaxation between reps improves control.
- Repeat for 8 to 12 holds.
Seated chest press isometric for upper-body strength
Isometrics build strength without equipment by creating steady tension, which can feel very safe when joints prefer predictable positions.
- Press your palms together in front of your chest, keeping elbows down and shoulders relaxed.
- Increase pressure until you feel chest and arm muscles engage, while your neck stays soft and your face stays calm.
- Hold for 10 to 20 seconds, breathing slowly through the hold, because steady breathing reduces dizziness.
- Rest for one slow breath between holds, then repeat 2 to 3 times.
Seated “row” isometric for posture muscles
Upper-back strength supports posture and reduces shoulder tension, which is especially helpful if you spend time at a desk or on a phone.
- Hook your hands under your thighs near the knees, then gently try to pull upward while your thighs resist by pressing down.
- Feel shoulder blades slide slightly back and down, because that is the posture-supporting action you want.
- Hold for 10 to 20 seconds with steady exhalations, because calm breathing keeps the effort joint friendly.
- Repeat 2 to 3 holds, using a lighter effort if wrists or shoulders feel sensitive.
Seated overhead reach and pull-down for shoulder mobility
Shoulders often tighten with stress and sitting, so gentle reaching can improve comfort without needing stretching that feels aggressive.
- Reach both arms overhead within a comfortable range, keeping ribs soft so you do not arch your back dramatically.
- Pull elbows down to your sides as if you are drawing something from above, feeling the upper back engage.
- Move slowly enough that your breath stays smooth, because speed often increases tension in the neck.
- Complete 8 to 12 controlled reps.
- Lift arms only as high as feels good if shoulders are stiff, because the “right” range is the one your body accepts today.
Seated torso rotation for gentle spine mobility
Rotation done slowly can help the upper back feel freer, while you keep the hips anchored for stability.
- Place hands lightly on your chest or reach arms forward, then rotate your ribcage a small amount to one side.
- Exhale as you rotate, because exhalation often reduces bracing and makes motion smoother.
- Return to center and rotate the other way, keeping your pelvis mostly still.
- Perform 6 to 10 rotations per side at an easy range.
- Skip or reduce range if rotation triggers back discomfort, because comfort guides the correct dose.
Seated side bend for lateral trunk support
Side bending trains controlled movement and can gently wake up muscles that support posture when you carry a bag or reach sideways.
- Slide one hand down your thigh while the other arm reaches overhead, keeping both sit bones heavy on the chair.
- Pause for a breath where you feel a mild stretch, because the goal is gentle, not extreme.
- Return to center slowly and repeat to the other side.
- Complete 6 to 8 reps per side.
Seated knee lift hold for core stability
Knee lifts build hip and core coordination, and the hold version keeps the movement calm while still challenging stability.
- Sit tall and exhale gently as you lift one knee a few inches, keeping your torso steady and your shoulders relaxed.
- Hold for 3 to 8 seconds while breathing softly, because breath-holding makes the move feel harder than it needs to.
- Lower with control and switch sides, keeping the pace unhurried.
- Perform 6 to 10 holds per side.
- Use a smaller lift if hip flexors feel tight, because smaller range can still train stability effectively.
Seated hand-to-knee press for safe core training
This cross-body isometric teaches the core to resist twisting, which is a very practical kind of strength for daily movement.
- Place your right hand on the outside of your left knee, then press the hand and knee into each other with moderate effort.
- Keep your torso facing forward while you breathe, because the goal is resisting rotation rather than rotating.
- Hold for 10 to 20 seconds, then switch sides with a smooth reset breath.
- Repeat 2 holds per side, using less effort if you notice neck tension.
The full beginner chair workout at home: a simple 12–18 minute plan
This chair workout routine is written so you can follow it like a recipe, because beginners thrive when the plan is already decided and the next step is clear.
Two formats are offered so you can match your day, because some people love timers while others prefer reps and a slower pace.
Format A: timed circuit for a steady rhythm
Set a timer for 40 seconds of work and 20 seconds of rest, then move through the list once for a 10-minute base session or twice for a longer session.
- Seated march with arm drive.
- Seated knee extensions.
- Seated heel raises.
- Seated overhead reach and pull-down.
- Seated hip hinge.
- Seated chest press isometric.
- Seated “row” isometric.
- Seated knee lift hold.
- Seated torso rotation.
- Seated side bend.
- Rest longer between moves if you feel breathless or lightheaded, because recovery is part of making this joint friendly.
- Reduce the work interval to 30 seconds if you are brand new, because shorter work periods often prevent dizziness.
- Choose two rounds only when round one felt smooth, because quality makes progress safer and more predictable.
Format B: rep-based routine for a calmer pace
Move slowly and complete the reps below, resting as needed so your breathing stays steady and your posture stays tall.
- Seated posture stack and breathing brace for 5 slow breaths.
- Seated march for 60 seconds at an easy-to-moderate pace.
- Seated knee extensions for 10 reps per leg.
- Seated heel raises for 15 reps.
- Seated toe lifts for 12 reps.
- Seated hip hinge for 8 slow reps.
- Seated chest press isometric for 2 holds of 15 seconds.
- Seated “row” isometric for 2 holds of 15 seconds.
- Seated knee lift holds for 8 holds per side.
- Seated torso rotation for 8 reps per side.
- Seated side bend for 6 reps per side.
- Seated glute squeeze holds for 10 holds.
- Repeat the full list once more if you feel good, because a second round increases volume without needing new exercises.
- Stop after the first round if fatigue makes posture collapse, because finishing with control builds confidence for the next day.
Mobility level options so the routine fits more bodies
Inclusive training means offering choices that keep the intent of the exercise while respecting different joints, different energy levels, and different comfort needs.
Scaling is not a step backward, because scaling is how you keep exercise available on more days of your life.
Level 1: extra-gentle version
- Use 20 seconds of movement followed by 40 seconds of rest, because generous rest reduces dizziness and keeps breath calm.
- Keep ranges small, especially for hinge and rotation, because small ranges can still build mobility safely.
- Choose isometrics over repeated reps when joints feel sensitive, because steady tension can feel more comfortable.
Level 2: standard beginner version
- Use the 40/20 timer, because it balances work and recovery in a simple, repeatable way.
- Increase arm drive during marching, because arms can raise heart rate without extra joint impact.
- Keep posture cues consistent, because consistent cues reduce mental load and improve form.
Level 3: higher-effort seated version
- Use 45 seconds of work and 15 seconds of rest, because shorter rest increases conditioning when your body is ready.
- Add a 2-second pause at the top of knee extensions, because pauses build control and intensity without speed.
- Include faster marching intervals, because brisk rhythm can make a seated routine feel surprisingly athletic.
Cool-down: 2–4 minutes to help your body settle
A cool-down brings breathing back to baseline and reduces the “wired” feeling some people get after movement, especially when they are new to exercise.
Gentle finishing moves also give you a moment to notice progress, because feeling calmer afterward is a meaningful training result.
Simple seated cool-down sequence
- Slow breathing for 30 to 45 seconds, where you inhale softly and exhale a little longer to signal safety to your nervous system.
- Neck and shoulder release for 30 seconds, where you gently turn your head side to side and drop shoulders away from ears.
- Seated chest opener for 30 seconds, where you clasp hands behind your back or simply pull elbows slightly back while keeping ribs soft.
- Seated hamstring stretch for 30 seconds per side, where you extend one leg and hinge forward only slightly, stopping before any back strain.
- Seated ankle circles for 20 seconds per side, because ankles often appreciate a calm reset after leg work.
- Stand up slowly after the cool-down if you are prone to dizziness, because quick transitions can cause lightheadedness.
How to progress with a chair workout routine without rushing
Beginners often assume progress requires harder workouts every day, yet steady improvement usually comes from tiny upgrades repeated consistently.
Stronger does not have to mean harsher, because a joint friendly home workout can progress through time, control, and confidence.
Four easy progression ideas
- Add 5 seconds to your work intervals, because time under tension is a safe way to increase challenge.
- Slow down the lowering phase of movements like knee extensions and hip hinges, because slow control builds strength without extra impact.
- Increase range of motion slightly only when the current range feels effortless and pain-free, because range should be earned with comfort.
- Complete a second round once or twice per week, because volume increases results when recovery is respected.
A simple weekly schedule for beginners
- Two days per week works well if you are new and sore easily, because recovery supports consistency.
- Three days per week often feels ideal for building momentum, because the habit stays alive without overwhelming your joints.
- Four days per week can be fine if intensity stays moderate, because chair sessions can be gentle enough to repeat when scaled appropriately.
Troubleshooting: common discomforts and how to respond safely
Learning to respond to signals is a core fitness skill, because the fastest route to long-term results is staying healthy enough to keep training.
Curiosity beats criticism when something feels off, because discomfort is usually information rather than a verdict about your ability.
If you feel dizzy during seated exercises
- Stop the movement and sit still with both feet planted, because grounding helps the body regain stability.
- Take slow breaths with longer exhales, because exhaling slowly can reduce the “rushed” feeling in your system.
- Drink a small sip of water and wait, because hydration and time often help mild lightheadedness pass.
- Resume only if you feel steady, choosing smaller ranges and longer rest, because gentler pacing reduces the chance of repeat dizziness.
If your neck feels tense or sore
- Lower shoulder intensity and relax your jaw, because jaw clenching often travels into neck tension.
- Reduce overhead range and keep arms in a comfortable window, because stiff shoulders often pull on the neck.
- Prioritize posture reset breaths, because stacked posture reduces the urge to crane forward.
If your low back feels uncomfortable
- Make hip hinges smaller and slower, because excessive forward lean can strain sensitive backs.
- Focus on ribs soft and tall posture, because rib flare can increase low-back arching.
- Choose more isometric core work like hand-to-knee presses, because isometrics can build support without repeated bending.
Signs that warrant professional input rather than “pushing through”
- Symptoms that include numbness, tingling, radiating pain, or joint instability deserve evaluation, because those signs can indicate issues that need individualized care.
- Chest discomfort, fainting, or severe shortness of breath should be treated seriously, because health always comes first.
- Pain that worsens over several days, or pain that changes how you move, is a strong reason to pause and seek guidance.
Gentle reminders that make a beginner chair workout at home sustainable
Consistency becomes easier when you treat each session like practice, because practice welcomes imperfect days and still produces real change over time.
Small sessions still count, especially when they reduce stiffness, improve mood, and build the identity of someone who moves regularly.
Comfort is a valid goal, because comfort often leads to more movement across the week, and more movement across the week is what adds up.
Notice: this content is independent and does not have affiliation, sponsorship, or control over any third parties, services, or products that may be mentioned in general terms.